In this video you’ll learn how to create a daily summary or daily update email for almost anything.
Some examples of that might be:
Get an email of all the tasks that were checked off in your project management system todayA list of all the Tweets with a certain keyword in it each dayA list of new posts from your favourite blogs or YouTube channels
I was prompted to create this because a customer of our software Content Snare asked if it was possible to create a daily summary email.
Content Snare is used by accountants, lawyers and marketing agencies to collect information and documents from clients.
This customer was an accountant who wanted an email that listed all of the documents he received from his clients with Content Snare that day.
At the time of recording, we don’t have that feature, but because of our Zapier integration, it’s possible.
This is not limited to Content Snare – with this skill that you’re about to learn, you’ll be able to create daily summary emails for basically ANY app that integrates with Zapier.
And it’s REALLY easy.
Let’s dig in.
Creating a basic daily summary email
Step 1: Create your trigger
You’ll trigger this workflow with whatever event you want a daily summary of.
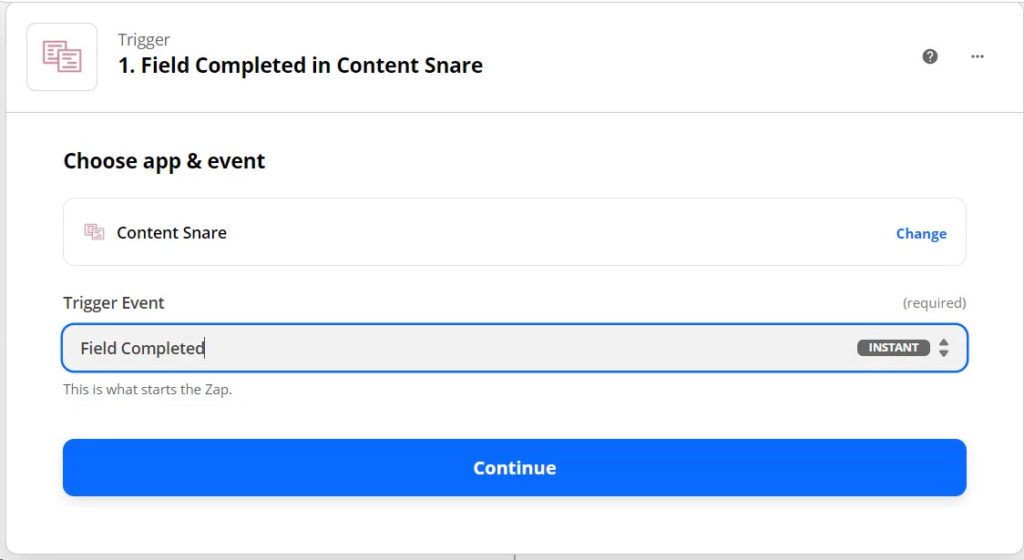
In this case we’re using Content Snare’s “Field completed” trigger. Every time a client completes a field, we’ll add it to our daily summary.
Go ahead and test the trigger to get some sample data.
If you don’t know how to test a trigger, check out my Zapier tutorial post & video.
Step 2: Create a Digest by Zapier action
Create an action using the Digest by Zapier app. Select the “Append entry and schedule digest” event.
Then set it up like this:
Title: This is a unique name for the digest. You don’t want to use the same name as another digest in your Zapier accountEntry: This is the text that will become one item in your daily summary list. I like using a dash at the start to indicate a bullet point. Or separating items with three dashes on a new line like “—”Frequency: How often you want to get the email
Step 3: Create an email action
Use the “Email by Zapier” app with “Send Outbound Email”.
Note: The email will come from Zapier. If you want it to come from yourself, use the Gmail App & Send Email action.
And set it up as follows:
This is just like writing an email. Add who you’re sending it to, give it a subject and a body.
Create the body by writing whatever you like, and then adding the “Current Digest” from the previous step.
Step 4: Turn the Zap on
That’s it!
Now just turn the Zap on and you’ll begin receiving a daily summary email of documents received in Content Snare.
The email might look like this:
Ideas on how to use Digest by Zapier
Here are a few different ways you can use this workflow, not just for receiving summary emails.
Get an email for all project management activity
For the trigger, use “Task completed” as the trigger from your project management tool.
List all tweets mentioning a keyword or your brand
Your trigger would be “Tweet matching search” in the Twitter app.
Deliver daily summaries to a Slack or Microsoft Teams channel
Replace the last step with “Create Channel Message” in Slack.
Add summaries as a task in your task manager
I use this same workflow to create a task in my task manager that lists all our feedback each week. Every time someone submits some feedback about Content Snare, it’s added to a digest. The digest appears in my task manager for me to check each week.
Combining multiple sources into one digest
Taking this to a more advanced level, you can combine multiple sources into one digest.
This requires 3 Zaps.
Zap 1: First source
Just like in the above example, create a workflow that has a trigger and digest action like this:
This says every time a Tweet matches a search, add it to the digest.
You just have to set up the digest slightly differently. Set the frequency to “Manual” and make sure you make a note of the name.
Zap 2: Second source
This Zap is exactly the same as the first one, but using your second source as the Trigger.
This time, the trigger is checking some of my favourite blogs for new posts.
Just make sure you use the exact same title for the digest.
Zap 3: Release digest
This Zap releases the digest and sends the email.
There are two main differences to the previous workflow:
The trigger is “Schedule by Zapier”You’ll use the action “Release existing digest” in the middle step, like this:
That’s it!
This 3 Zap combo would create a weekly email combining Tweets and blog posts.


Deixe um comentário